
An open wardrobe puts clothes at your child's height so they can choose, dress, and tidy up independently. Below you'll find ideal rod heights by age, how to set one up (DIY or store-bought), safety checks, labels, and a simple morning and evening routine you can start today.
Key takeaways
- Keep choices limited for calmer mornings and better follow-through.
- Set the rod at shoulder height so your child can lift items on and off.
- Use labels and a clear left-to-right layout to support order.
- A short daily routine matters more than a perfect setup.
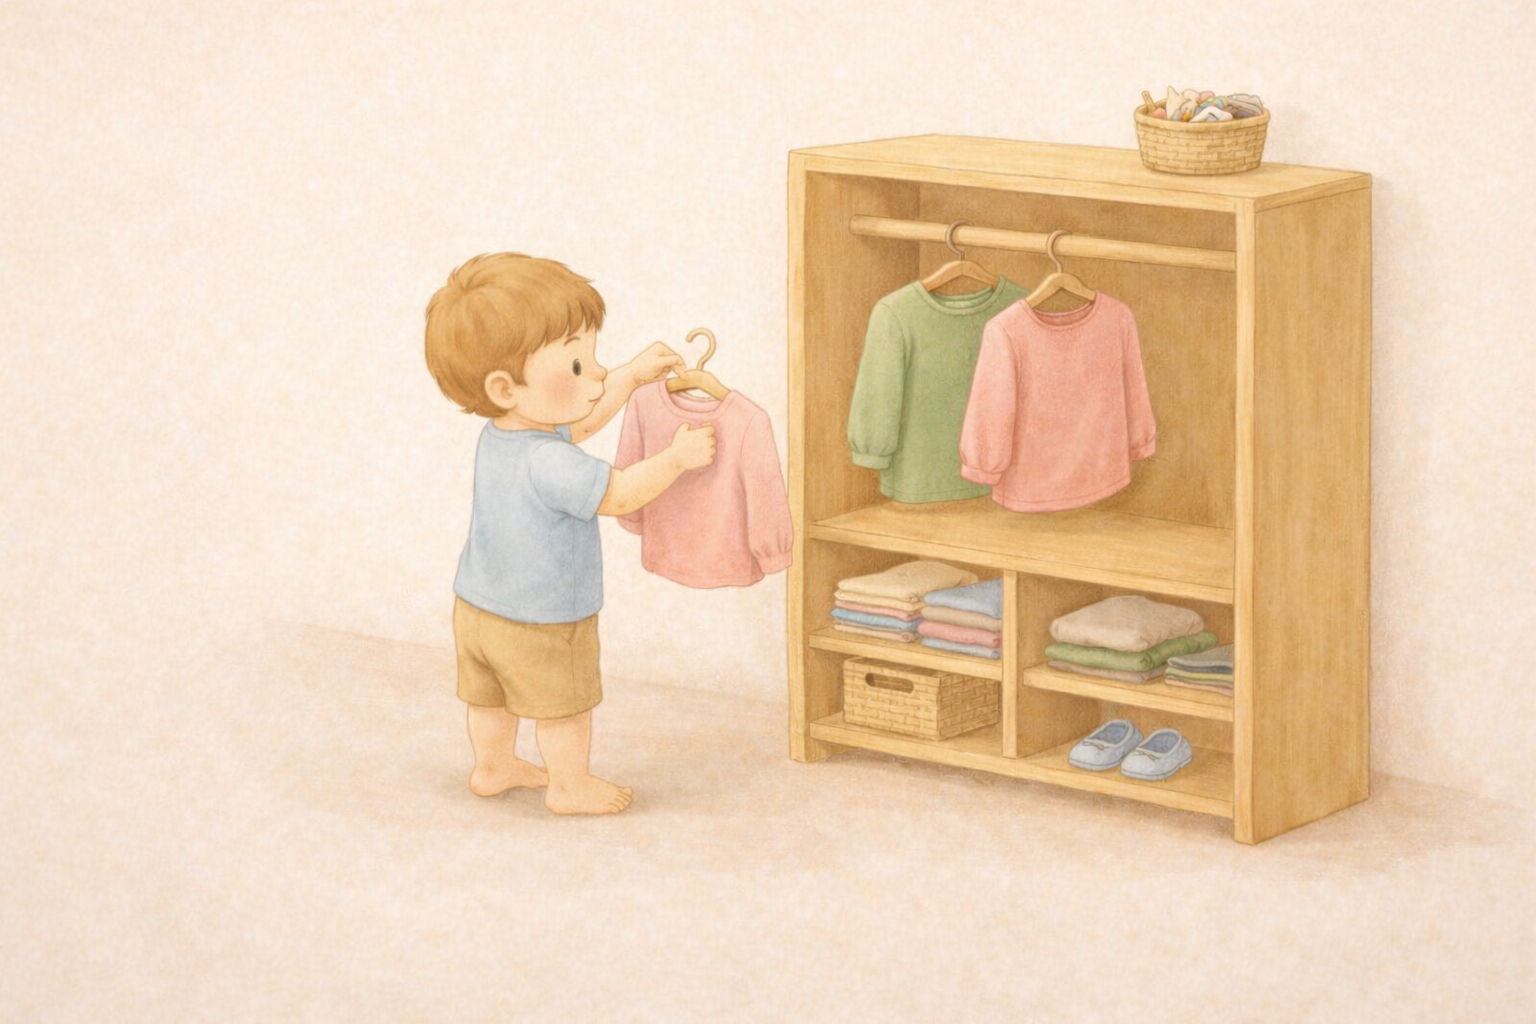
Table of contents
- Why an open wardrobe?
- Quick-start: what to put out
- Rod height by age
- Layout that works
- Safety checklist
- Step-by-step setup
- Daily routine
- Troubleshooting
- Low-cost options
- What to buy
- FAQs
- Related guides
Why an open wardrobe?
- Independence: your child can reach, choose, and hang items without help.
- Order: limited choices reduce decision overload and lead to calmer mornings.
- Care of self: daily practice with clear feedback (empty hanger, mismatched socks, overfilled bin).
Quick-start: what to put out
- 2-3 complete outfits (top and bottom), 1 outer layer.
- 2 pairs of socks, 1-2 underwear, 1 pair of indoor shoes or slippers.
- Keep the rest in a parent zone (high shelf or closed drawer) and rotate weekly.
- Add a low mirror (shatter-safe) and a small hamper within reach.
Rod height by age
Start points (adjust to shoulder height):
| Age | Rod height (from floor) | Hanger tips |
|---|---|---|
| 12-18 months | 35-45 cm | Toddler hangers; add front hooks for hats or bibs |
| 18-24 months | 45-55 cm | Keep hangers light; wide neck opening clothes |
| 2-3 years | 55-65 cm | Space hangers 4-5 cm apart |
| 3-4 years | 65-75 cm | Add a second low shelf for folded items |
| 4-5 years | 75-85 cm | Consider two rods (shirts above, pants below) |
Rule of thumb: set the rod at your child's shoulder height so they can lift items on and off without tipping the hanger.
Layout that works
- Left to right: outerwear, tops, bottoms, socks and underwear, shoes, hamper.
- Shelves and bins: 1 bin equals 1 category; label with picture and word.
- Hooks (30-40 cm high): pajamas and tomorrow's outfit.
- Mirror (30-45 cm wide): mount at eye level; add a hairbrush cup next to it.
Safety checklist (scan and set)
- Anchor any unit over 60 cm; avoid top-heavy designs.
- No glass doors; avoid pinch points.
- Rounded edges; cover exposed screws.
- Non-slip feet or wall strap; keep path clear to avoid trips.
- Keep cords and blinds out of reach; outlet covers nearby.
Step-by-step: set up an open wardrobe
Supplies (choose one path)
- DIY: narrow shelf unit (or cube shelf), wooden dowel (18-22 mm), two dowel cups or brackets, 2-4 small bins, 6-8 toddler hangers, wall anchors.
- Ready-made: low open wardrobe with rod and 1-2 shelves, bins, hangers.
Build and arrange (about 60 minutes)
- Measure your child's shoulder height and set the target rod height.
- Install the rod: cut dowel to inside width, screw in cups, press-fit dowel, tug-test.
- Anchor the unit to a wall stud or with an anti-tip kit.
- Add bins and labels (socks, underwear, accessories).
- Lay out 2-3 outfits left to right; add a hook for pajamas.
- Practice together: model taking a hanger off, choosing, then hanging back.
- Introduce the routine below and keep choices consistently limited.
Daily routine (what it looks like)
- Morning (5 min): child picks 1 of 2 outfits; returns unused item to hanger.
- Evening (3 min): pajamas on the hook; dirty clothes to hamper; choose tomorrow's outfit and place it on the hook.
- Weekly (10 min): rotate outfits with your child, wipe shelf, refresh labels if needed.
Control of error: empty hanger means outfit chosen; socks unmatched; labels do not match contents.
Troubleshooting
- Everything ends on the floor: reduce choices to 2, increase rod space, use lighter hangers.
- Child ignores the wardrobe: start with hooks at 35-45 cm, move to hangers after success.
- Cannot reach: lower the rod by 5 cm or add a stable step (with adult supervision).
- Overstuffed bins: one category per bin; if it does not fit, it rotates out.
Low-cost options
- Short bookshelf plus dowel across two side brackets.
- Small clothing rack with cut-down legs and rubber feet.
- Reuse sturdy wooden crates as shelves; sand and round the edges.
- Print picture labels at home; laminate with packing tape if needed.
What to buy (short list)
- 6-8 toddler hangers
- 2-4 fabric bins
- 1 low mirror (shatter-safe)
- 1-2 hooks
- Hamper
- Anti-tip kit
- Non-slip pads
FAQs (quick answers)
How many outfits should I offer?
Start with 2 complete choices and move to 3 once decisions are smooth.
Rod or hooks for beginners?
Hooks are easier under age 2. Introduce hangers once your child can lift and align without frustration.
What if our home is small?
Use a narrow unit with one rod at 55-65 cm and one shelf. Store overflow elsewhere and rotate weekly.
How do I teach hanging?
Slow demo: slide hand under shoulder, lift, align hook, gentle push. Step back and let the child try.
Winter gear?
Add a low basket for hat or neck warmer and a floor tray for boots. Keep only one set out.
Related guides
- Montessori Bedroom Setup: Floor Bed, Bookshelf and Storage
- Montessori Floor Bed: Age, Safety, and Setup
- Montessori Sleep: Bedtime Routines by Age (1-6)